|
System Setup |

|

|
|
|
System Setup |
|
|
System Setup
|
System Setup |
|
|
|
|
System Setup |
|
|
There are global parameters for document processing, reporting hours, and outsourcing requirements. These settings are independent of document and account definitions. Configurations in System Setup apply to the application as a whole and affect all document types and locations.
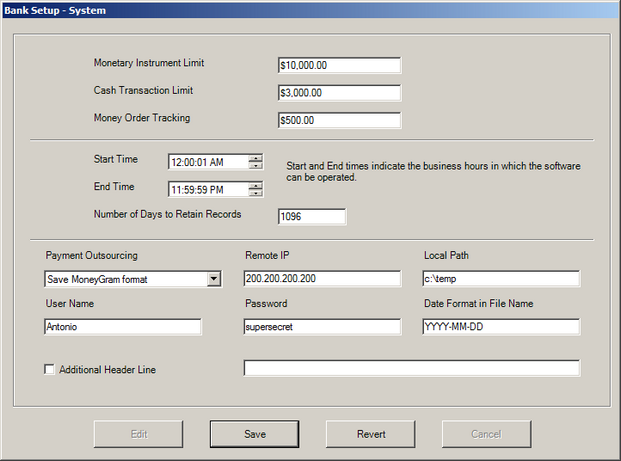
eSigna tracks the issuance of cash transactions for the purpose of CTR (Cash Transaction Report) and MIL (Monetary Instrument Limit) reporting. eSigna will flag any transaction having (1) a cash transaction Offset and (2) an amount exceeding the settings configured in this section so they can be easily reported/reviewed.
|
![]() Configure eSigna Access and Data Purge
Configure eSigna Access and Data Purge
Configure application availability relative to the operator's workstation time. Consequently, a single start and end time can span multiple time zones. Operators will not be allowed access into eSigna either before or after the set start/end times.
|
![]() Configure Payment Outsourcing Settings
Configure Payment Outsourcing Settings
Transactions completed in eSigna can be uploaded to third-party outsourcing providers. This section configures the upload settings. Option include the creation of a flat text file or FTP transfer to Integrated Payment Systems (IPS) or Travelers Express MoneyGram.
1) For FTP methods:
2) For flat files:
|
||||||||||||||
|