eSigna.Net Help Manual

Document Designs

Document Designs

Previous topic Next topic  

Document Designs

Previous topic Next topic  

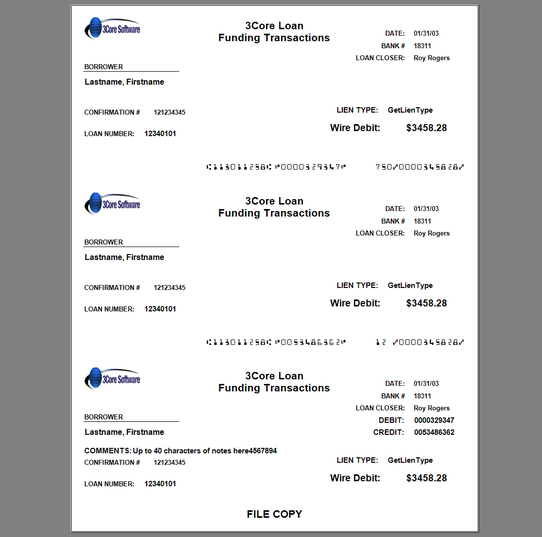
Document Designs determine the physical layout of each of your Document Templates.  Every detail of your document (Pay to, Amount, Customer, Remarks, Text, Logos, Dates, etc.) can be configured to appear anywhere on the document. eSigna allows the creation of unlimited document designs to provide extensive flexibility in the creation of document templates.

Each design template is set up as a master design comprised of several individual subordinate design files, each of which may include references to design macros.  The macros pull data from eSigna's database (document entry, the user's account, region/branch and payable account configurations etc).  Each component is necessary in order to have a complete document ready to print on blank document stock.
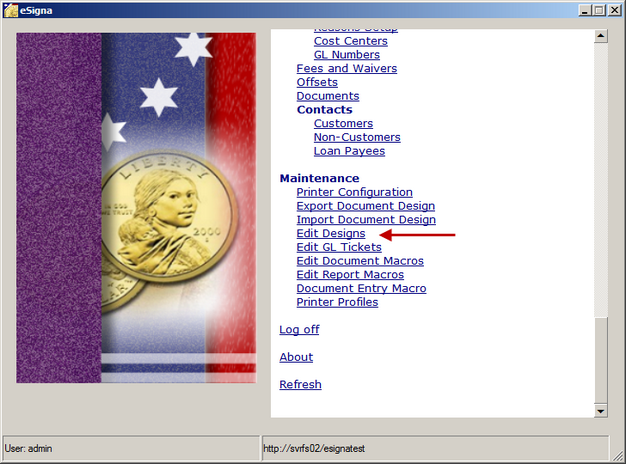
 

       Searching the Design Template List

Each document type is assigned to a master design or template.  A master design template must have at least one subordinate design file associated with it.


Depending on the number of designs, it may be helpful to search for a specific design by Name or Type.


In the List view, click on the Design column header to sort designs by name or, click on the Master column header to sort designs by type (master or subordinate).
Alternatively, enter the first letter of the design name to select the first occurrence of a design that begins with the letter entered.


       Adding and Editing Subordinate Designs

Before Master designs can be created, at least one underlying sub-design must exist.  The subordinate design is the basic building block for all master design templates.  Each subordinate design can be used to store MICR information, design logos, digitized signatures, and other document particulars that print.  Each subordinate design is created to maximize efficiency and help with design maintenance.


During the installation of eSigna, 3Core Software created design templates as required by the project outline.  It's often helpful to use these templates as guides when creating new document designs.


Click to Shrink/Expand


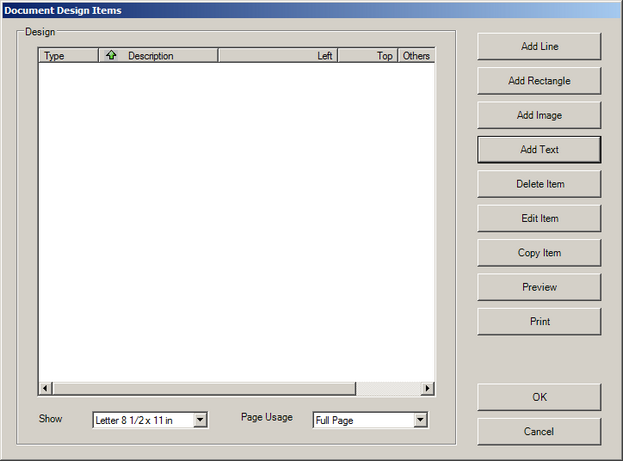
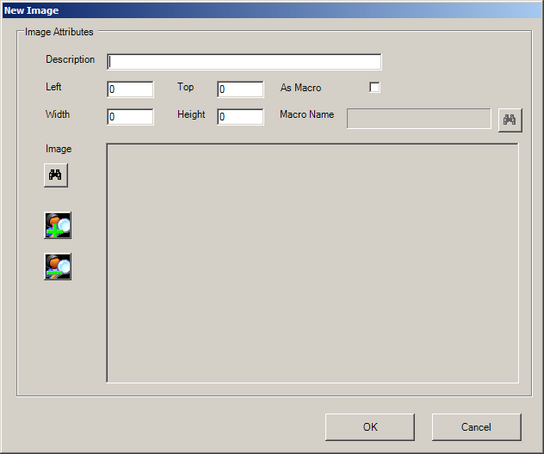
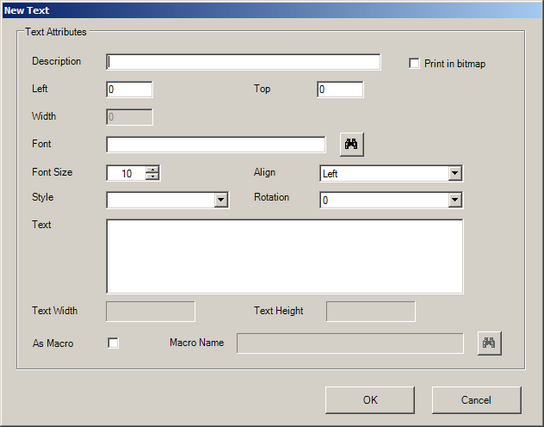
Click Add Design and enter a brief, descriptive design Name and click OK. In the resulting screen;


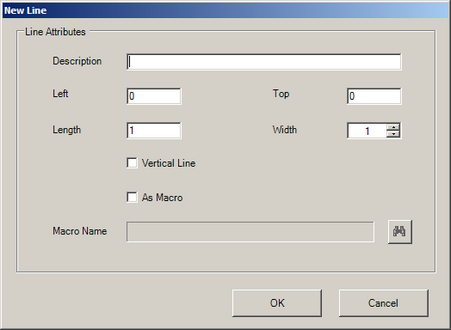
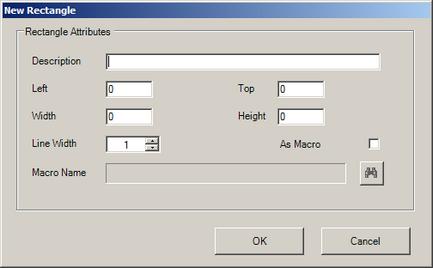
At least one feature (line, rectangle, image, or text) must be added to a design for it to be saved.


       Editing a Sub-Design

For help editing Master designs, click here.


Many events can precipitate design changes - changes in policy, address, logo and branding and form/stock changes to name a few.


1.If needed, use Search to find the target design.
2.Select the design to be edited and click Edit Design
3.Delete Item - select a particular item and click Delete Item to remove it from the design.
4.Copy Item - select a particular item and click Copy Item to copy one design item and reuse its attributes for an additional item on the document.
5.Edit Item - select a particular item and click Edit Item to adjust its attributes as described below:


Add Line provides the means to insert a vertical or horizontal line.  Set the line attributes by typing a short Name  and configuring the Left, Top, Length, and Width.  By default, the line is horizontal.  Select Vertical Line to change to veritcal.  If the line is to be activated by a macro, check As Macro and select the Macro Name.  Click OK to save changes. Example Dialogue box

Add Rectangle inserts a box (such as a box around a dollar amount).  Set the rectangle attributes by entering a short Name and configuring the Left, Top, Width, Height and Line Width.  If the rectangle is to be activated by a macro, check As Macro and select the Macro Name. Example Dialogue box

Use Add Image to insert a bank or company logo or digitized signature.  eSigna can import bitmap (.bmp), JPEG, and other standard Windows graphics formats.  It is recommended to ensure the graphic file be reduced in file size as much as possible to increase performance as client workstations download design files.  Set the image attributes by typing a short Name  and configuring the Left, Top, Width, and Height.  Use the binocular icon to search  for the stored image file.  If the image is to be activated by a macro, check As Macro and select the Macro Name. Example Dialogue box


The most common action is to Add Text.  Set the text attributes by typing a short Name and configuring the Left and Top values.  If Align is changed to center or right, type a width and height value.  Use the binocular icon to select a Font type, adjust the Font Size, Style, and Rotation.  Next, enter the actual Text to print for this item.  If the text is to be pulled programmatically from the form or database, specify the macro name. Example Dialogue box


Once added and tailored, design items can be Previewed, Printed or saved.  To save, click OK


1.If needed, use the Search feature to locate the target design.
2.Select the design file to be deleted and click Delete Design
3.Click OK to confirm deletion.


Note: Sub-designs that are referenced in a master design may not be deleted.


       Adding a Master Design

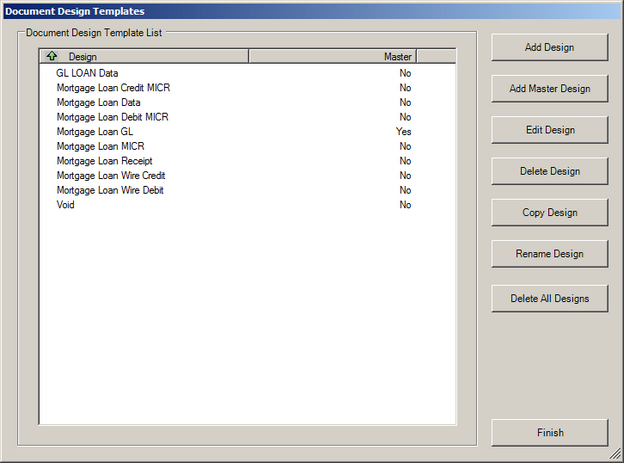
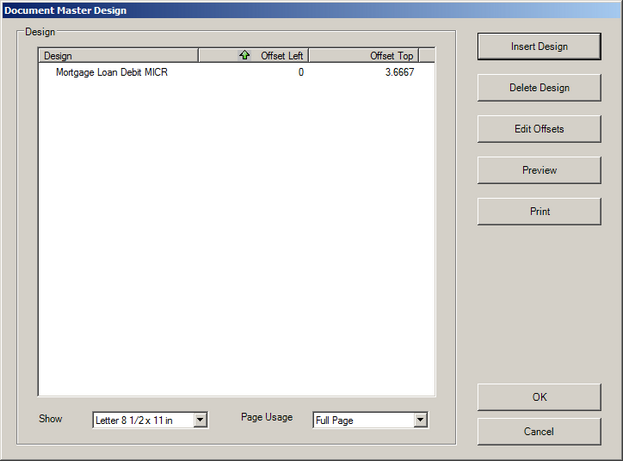
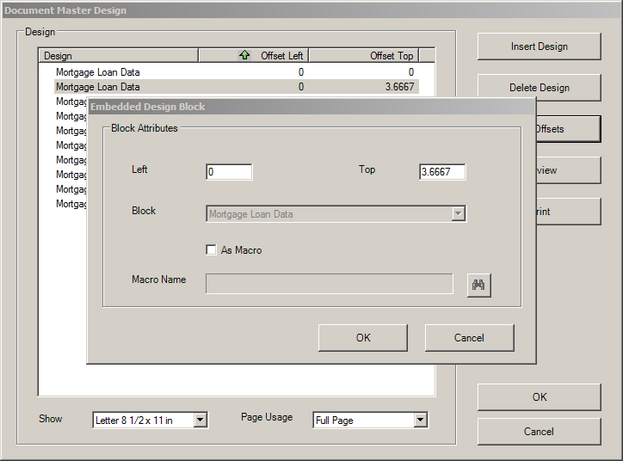
Document Designs consist of Master and Subordinate Designs.  In the picture below all designs are visible, both Master and Subordinates.   Master Designs are commonly named similarly to the documents they’re associated with (Mortgage Loan GL, Official Check,etc).   By contrast, sub-designs are frequently used by more than one Master Design and are usually named for their function (Mortgage Loan Receipt, Mortgage Loan MICR). Before Master designs can be created, at least one underlying sub-design must exist.  The subordinate design is the basic building block for all master design templates

Click to Shrink/Expand

Click Add Master Design and enter a short, brief Name and click OK.  The resulting screen;


1.Set the Show page format (letter, legal or A4) and the Page Usage (full, half, third, quarter)
2.Click Insert Design to add sub-designs.  Set the X (left/horizontal) and Y (top/vertical) Offset for the added design.
3.Click OK to complete the process or repeat step 2 until all subordinate designs have been added.


       Editing and Viewing Master Designs

For help on editing subordinate designs, click here.


From the master design view, changes can be made to sub-design offsets, the inclusion or exclusion of sub-designs and the stock and layout size for the master design.  Individual sub-design items may not be edited here.


1.Select a Master Design and click Edit Design
2.To view the design of the master design, click Preview (or click Print to see its layout in printed form). Example

3.To edit the offsets (X-horizontal, Y-vertical) of a specific subordinate design, highlight the design and click Edit Offset. Example

4.Make the necessary changes and click OK
5.To delete a subordinate design, select the sub-design and click Delete Design
6.Click OK to complete the process and save your changes and return to the main list of design templates.


       Renaming or Copying a Design

Design files can be copied and renamed to facilitate the efficient creation of supplemental designs.


Renaming:

1.If needed, use Search to locate the target design.
2.Select the design file to be renamed.
3.Click Rename
4.Type the new Name for the design.
5.Click OK


Copying:

1.If needed, use Search to locate the target design.
2.Select the design file to be copied.
3.Click Copy Design.
4.Type the Name for the copied design. Note:The new design name must be unique.
5.Click OK