User Authentication Options
3Core Software products provide two ways to authenticate users; application accounts or single sign-on (SSO). Small to mid-size organizations that don’t have dedicated IT departments typically authenticate using application accounts. In these organizations, often the application admin controls which employees can access the software, and what features each employee has access to. Larger organizations with dedicated IT staff sometimes opt to use SSO. SSO integrates user authentication into the application with Microsoft’s Active Directory (AD) and can reduce the account management burden on the application admin.
There are several benefits to using SSO. To name a few:
| 1) | Employees won’t have to remember yet another username and password |
| 2) | Reduced time spent re-authenticating each time the application is run |
| 3) | Reduced calls to IT about password/authentication issues |
Of course there are other considerations as well. SSO provides access to multiple resources once the user is initially authenticated and so offers the proverbial, “keys to the castle”. Therefore, use of SSO should be accompanied by greater protection of user credentials and perhaps stronger rules for acceptable passwords.
Expand this entire topic
Managing Application Accounts:
Overview: Create user accounts in a non-SSO environment. These accounts are setup in eSigna's database, usually by the eSigna administrator. Application account usernames and passwords do not have to match network login usernames and passwords. The passwords do have to conform to the guidelines defined in Security Settings.
 Creating a new account
Login to eSigna, Main menu> Configuration> User and Group Setup> User Setup
 | | Click to shrink/expand |
By default, all active users are listed.
 | | Click to shrink/expand |
Filter/limit the results to include deleted users and/or only those users in specific Groups, Regions or Branches and then click Refresh. To begin a new search, click Reset and select new filtering criteria. Add users by clicking on New User in the top right corner.
 | | Click to shrink/expand |
 | | Click to shrink/expand |
Required Fields
| 1. | Username - Your organizational rules and policies will dictate the naming convention for user accounts. |
| 3. | Active Until date is preset based on Security Settings in Bank Setup, but can be changed. |
| 4. | Password Expires at date is preset based on Security Settings in Bank Setup, but can be changed. |
| 5. | Managerial Right - The default value is None. The following table defines each level of authority for the selected managerial right: |
 Explanation of Managerial Rights Explanation of Managerial Rights
Selection
|
Right/Privilege level
|
None
|
No managerial privileges. User will only be able to view and report data of records for which they are the assigned owner.
|
Multi-Group
Multi-Region
|
User has managerial approval and reporting rights for all groups in all regions.
|
Multi-Group Region
|
User has managerial approval and reporting rights for all groups within his/her assigned region.
|
Multi-Group Branch
|
User has managerial approval and reporting rights for all groups within his/her assigned branch.
|
Single-Group Multi-Region
|
User has managerial approval and reporting rights for his/her assigned group in all regions.
|
Single-Group Region
|
User has managerial approval and reporting rights for his/her assigned group within his/her assigned region.
|
Single-Group Branch
|
User has managerial approval and reporting rights for his/her assigned group within his/her assigned branch.
|
|
6. To save the new user account, click OK.
|
Managing Single Sign-On Accounts
Overview: Prerequisite: SSO has been enabled in the 3CoreConfig.XML file by eSigna Administrator
Create an AD security group and populate it with AD accounts that should have access to eSigna. Login to eSigna, add the AD users from the security group created in AD and then configure each user’s group access.
Creating a new account
Configuring Users in an SSO implementation
Steps:
| 1) | In AD, create the appropriate group for access to the application, eSignaUsers for instance, and populate the group with accounts that will need access to eSigna. This step is typically handled by a domain/security administrator. |
| 2) | Login to the application, Main menu> Configuration> User and Group Setup> User Setup |
| | Click to shrink/expand |
| 3) | By default, all active users are listed. |
| | Click to shrink/expand |
| 4) | Filter/limit the results to include deleted users and/or only those users in specific Groups, Regions or Branches. Add users by clicking on New User in the top right corner. |
| | Click to shrink/expand |
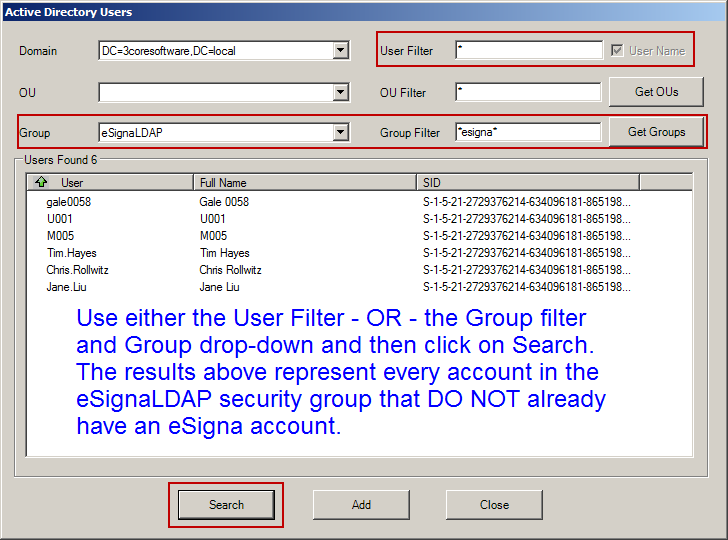
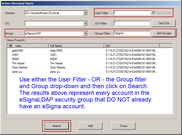
| 5) | Select an AD Group OR an AD User Id and then click Search to list AD user accounts eligible to be added to the application. |
 | | Click to shrink/expand |
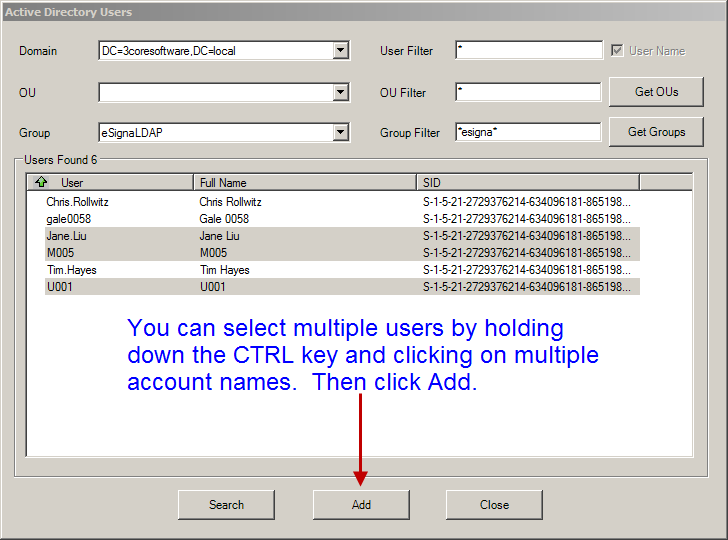
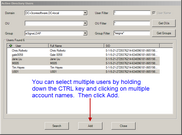
| 6) | Add either a single user or multiple users at once (provided all are to be granted access to the same features of the application). Select users that will have identical access rights by using CTRL+Click on each user. |
 | | Click to shrink/expand |
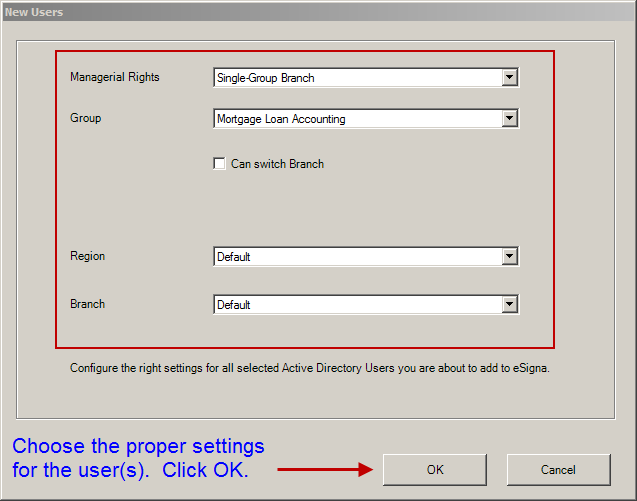
| 7) | Now select the access rights, Branch, Region, Group and Approval Limit if appropriate. |
 | | Click to shrink/expand |
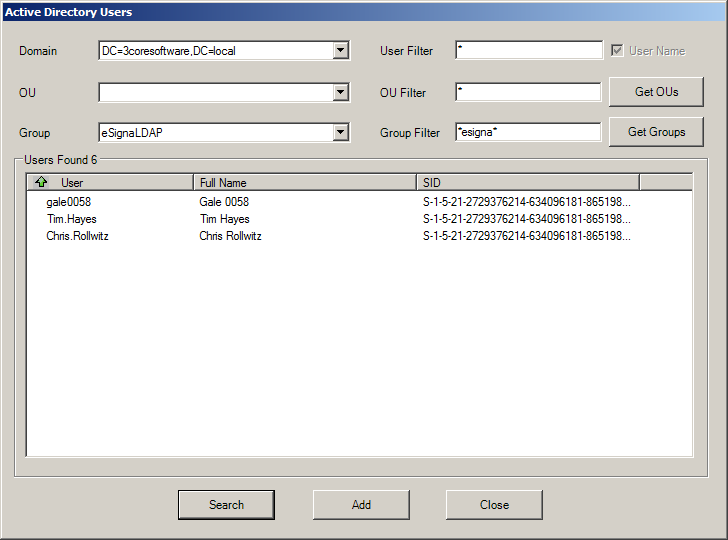
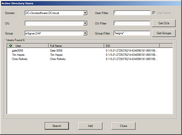
| 8) | After clicking OK, control returns to the search screen so that other users can be added from the AD security group to the application. |
 | | Click to shrink/expand |
Click Close when you’re finished adding users.
|